E001 Creating a simple reader
 A reader loads
the data of a given format and converts its contents into the internal representation. This
article shows how to extend impulse by a simple reader creating several float signals. The article
uses the ExampleFloatReader class in the Extension Toolkit.
To create a reader you can either take an example reader from the extension toolkit as basis or you use the new Reader Wizard for plug-in projects (see screen cast).
Constructor
The reader class needs to have the following two constructors. You will not get an error or warning if they are not existing, it will just not work !
     public ExampleFloatReader() {
        super();
    }
    public ExampleFloatReader(String id, InputStream in) {
        super(id, in);
    }
Is the file applicable ?
To check if a file is applicable, the reader has two methods. First method validates the name of the file:
     @Override
    protected int isApplicable(String name, String contentType) {
        if (name != null && !name.equals("toem.float.example"))
            return NOT_APPLICABLE;
        return 8; // need 8 bytes to check
    }
Here we just check if the name equals "toem.float.example", the attached example file. Usually you would check for the correct ending. Please have in mind that the name may be null. In this case skip the check.
The method may return NOT_APPLICABLE, APPLICABLE or an integer > 0 if the name is ok but want to check the content:
     @Override
    protected int isApplicable(byte[] buffer) {
        if (buffer[0] == '#' && buffer[1] == 'E' && buffer[2] == 'X' && buffer[3] == 'A')
            return APPLICABLE;
        return NOT_APPLICABLE;
    }
In this case, the second isApplicable method is called. The parameter buffer contains the first N (as returned in isApplicable(String name)) bytes of the file.
At this point you need to decide if the file is applicable and return either NOT_APPLICABLE or APPLICABLE.
The parser
In this example parser we don't really parse an input. Instead we just create a record with two scope and 3 float signals Signal1 .. 3.
     @Override
    protected void parse(InputStream in) throws ParseException {
        // Init the record
        initRecord("Example Record", TimeBase.ns);
First step is to init the record with a name and the domain base. The domain base may be a time unit (TimeBase.ns, TimeBase.ms, TimeBase.us, ...) or a frequency unit (FreuqncyBase.Hz,..)
Next step is to create the scopes and signals:
         // We forget the input and create a record with scopes and 3 signals
        Scope system = addScope(null, "System"); // null means at root
        Signal float1 = addSignal(system, "Signal1", "My first float Signal",
        		ProcessType.Discrete, SignalType.Float, SignalDescriptor.Float64);
        Signal float2 = addSignal(system, "Signal2", "My second float Signal",
        		ProcessType.Discrete, SignalType.Float, SignalDescriptor.Float64);
        Scope another = addScope(system, "Another");
        Signal float3 = addSignal(another, "Signal3", "Another float",
        		ProcessType.Discrete, SignalType.Float, SignalDescriptor.Float64);
In this example we just care about float signals. The signals may use 32 or 64 bit float types.
If anything goes wrong while parsing the input, the reader shall throw a ParseException:
         // if you find a problem, throw an exception
        if (wrong)
            throw new ParseException("Not Valid");
After we have created all signals, we can open the sample writers:
         // We start at 0 ns
        long t = 0; // 0 ns
        open(t);
Instead of t=0 , you can use any positive or negative time value.
No we can write the signal values:
        // And continue until 100000 ns
        for (; t < 100000; t += 10) {
            // write the sin and cos data
            ((IFloatSamplesWriter) getWriter(float1)).write(t, Math.sin((t + 100) / 3000.0) * 10.0);
            ((IFloatSamplesWriter) getWriter(float2)).write(t, Math.cos((t + 200) / 1000.0) * 10.0);
            ((IFloatSamplesWriter) getWriter(float3)).write(t, Math.sin((t + 300) / 6000.0) * 10.0
            		+ 10.00001);
        }
With getWriter(signal) you get a writer of type IFloatSamplesWriter (as it is a float signal). The first parameter t is the time. t must be equal or greater than the value used before in a write or open call of this writer.
Finally we close all writers with:
        // And close finally
        close(t);
Extensions
Now the reader class is ready, but unknown to the system. Open the file plugin.xml in the example plugin. Change to tab Extensions.

These settings make your reader visible for Impulse.

And these settings make your file extension known to Eclipse as an Impulse record file.
Debug your Reader
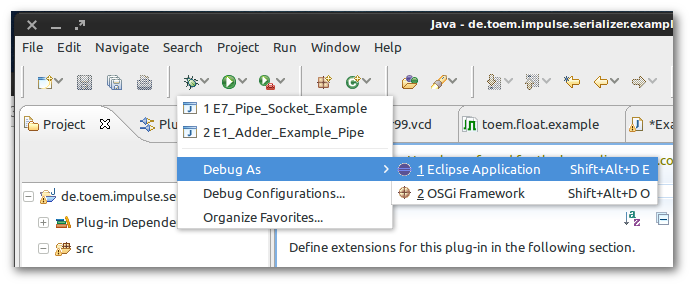
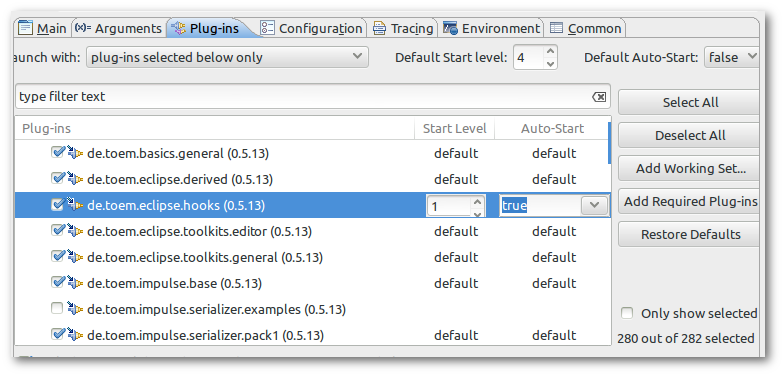
Start your plugin as an eclipse application. Make sure that the plugin de.toem.eclipse.hooks on the run configurations plugin page has the following settings.
Export
To create a deployable plug-in, go to Export:
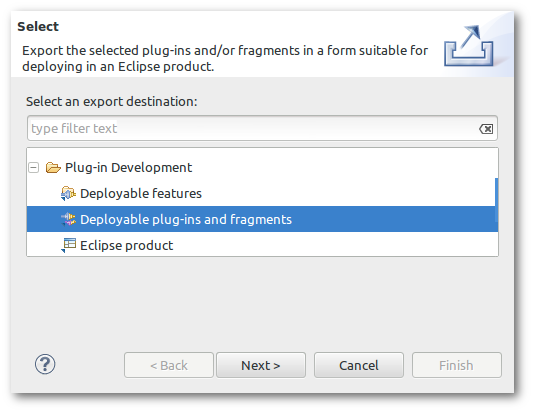
And select deployable plugins and fragments.
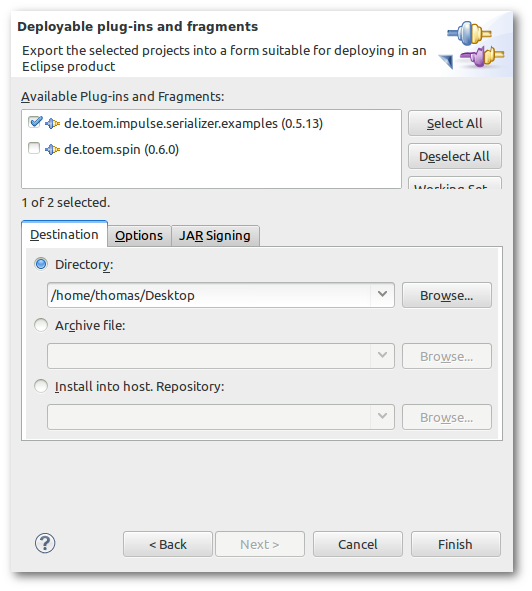
Select your plugin, browse for a target folder and press Finish. Now you can put your plugin into the dropin folder of eclipse.
Result
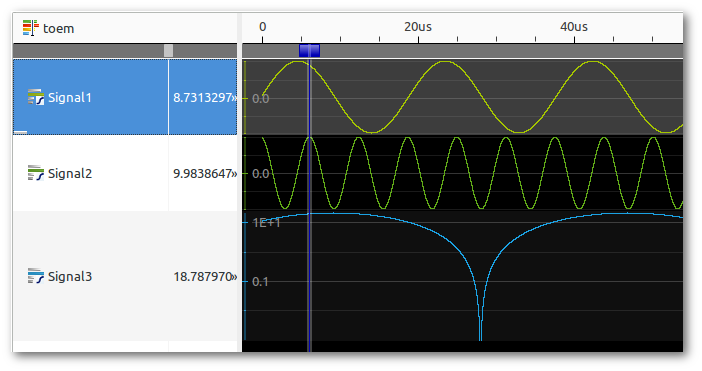
Next article will be about how to handle logic, integer and other datatypes.

